Get started integrating Rails 4 and QuickBooks Online with the Quickeebooks Gem: Part 2
- Part 1: Make an OAuth connection between a Rails 4 app & QBO.
- Part 2: Create a Vendor on both Rails app and QBO.
- Part 3: Disconnecting from QBO.
- Part 4: Implementing Single Sign On.
- Code presented below is also available on Github
Table of Contents
Part 2 aim
Create and update a vendor on both the Rails app and QB0.
- Add an
email_addressattribute to the Vendor. - Add
email_addressto the views. app/views/vendors/_form.html.erbapp/views/vendors/index.html.erbapp/views/vendors/show.html.erb- Reload browser at
billtastic.dev/vendorsand test that the views have been updated. - Create a new vendor locally and within QBO.
- Add a
before_actionfilter withinapp/controllers/vendors_controller.rbto activate the Quickeebooks vendor service. - Whitelist the
email_addressattribute within thevendors_controller. - Modify the
createaction within thevendors_controller. - Go to the browser and refresh
billtastic.dev/vendorsand then clickNew vendorlink.
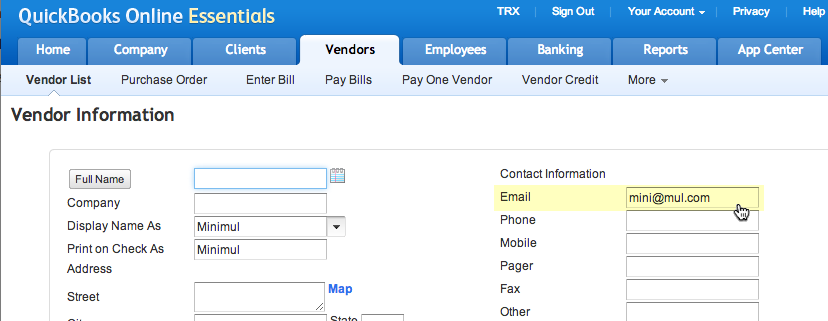
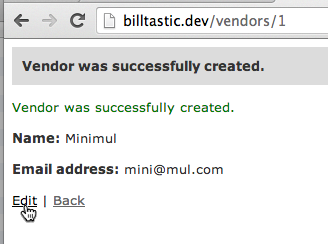
Fill in these fields and click 'Create Vendor'. - Go over to QBO and check to see that the vendor was created.
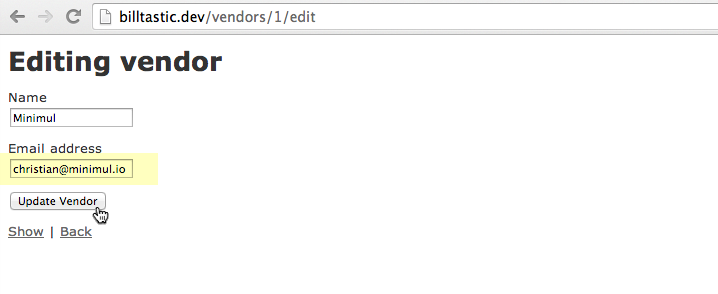
- Now let's change the email address to exercise Quickeebooks' update functionality. Go back to the browser and click 'Edit'.
- Modify the
updateaction within thevendors_controller. - Let's go back to the browser, which should be at the url
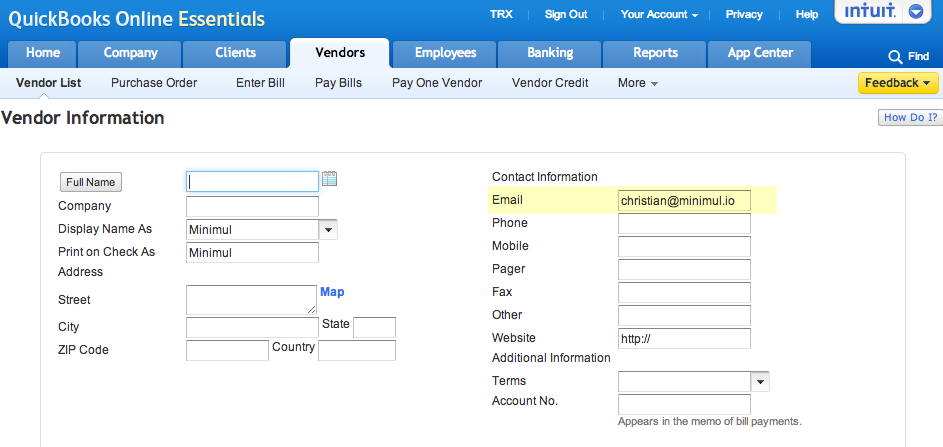
billtastic.dev/vendors/1/edit. - Go back to QBO and check to see that the update was successful.
$ rails g migration add_email_address_to_vendors email_address
$ bundle exec rake db:migrate
... omitted
<div class="field">
    <%= f.label :email_address %><br>
    <%= f.email_field :email_address %>
</div>
... omitted
   ... omitted
    <tr>
      <th>Name</th>
      <th>Email address</th>
      <th></th>
      <th></th>
    </tr>
  </thead>

  <tbody>
    <% @vendors.each do |vendor| %>
      ... omitted
      <tr>
        <td><%= vendor.email_address %></td>

        <td><%= link_to 'Show', vendor %></td>
        <td><%= link_to 'Edit', edit_vendor_path(vendor) %></td>
        <td><%= link_to 'Destroy', vendor, method: :delete, data: { confirm: 'Are you sure?' } %></td>
      </tr>
    <% end %>
  ... omitted
... omitted
<p>
  <strong>Email address:</strong>
  <%= @vendor.email_address %>
</p>
... omitted
class VendorsController < ApplicationController
  before_action :set_vendor, only: [:show, :edit, :update, :destroy]
  before_action :set_qb_service, only: [:create, :edit, :update, :destroy]
#... omitted
    private
#... omitted
    def set_qb_service
      oauth_client = OAuth::AccessToken.new($qb_oauth_consumer, session[:token], session[:secret])
      @vendor_service = Quickeebooks::Online::Service::Vendor.new
      @vendor_service.access_token = oauth_client
      @vendor_service.realm_id = session[:realm_id]
    end
end
DISCUSSION: Put
before_action after the set_vendor filter, which was created by the scaffolding generator in Part 1. The set_qb_service method should be private and the very last method of the class.
    def vendor_params
      params.require(:vendor).permit(:name, :email_address)
    end
  def create
    @vendor = Vendor.new(vendor_params)
    vendor = Quickeebooks::Online::Model::Vendor.new
    vendor.name = vendor_params[:name]
    vendor.email_address = vendor_params[:email_address]
    @vendor_service.create(vendor)
    respond_to do |format|
      if @vendor.save
        format.html { redirect_to @vendor, notice: 'Vendor was successfully created.' }
        format.json { render action: 'show', status: :created, location: @vendor }
      else
        format.html { render action: 'new' }
        format.json { render json: @vendor.errors, status: :unprocessable_entity }
      end
    end
  end


  def update
    respond_to do |format|
      if @vendor.update(vendor_params)
        vendor = @vendor_service.list.entries.find{ |e| e.name == vendor_params[:name] }
        vendor.email_address = vendor_params[:email_address]
        @vendor_service.update(vendor)
        format.html { redirect_to @vendor, notice: 'Vendor was successfully updated.' }
        format.json { head :no_content }
      else
        format.html { render action: 'edit' }
        format.json { render json: @vendor.errors, status: :unprocessable_entity }
      end
    end
  end
DISCUSSION: The first highlighted line is searching your QBO vendor entries that match the submitted name and then returning the vendor. Notice in the next line that I only have the
email_address as an update-able attribute and not name. This is because the name attribute for a Vendor (and other QBO entities such as Employee and Customer) is a unique attribute and can't be modified.


Finished Next
This concludes a 2-part tutorial where a QuickBooks Online entity was created and updated from a Rails app. I sincerely hope this series aids your ramp up time in getting integrated with QuickBooks Online. Of course, don't hesitate to point out errors or ask for clarification within the article's comments. This tutorial continues with Part
3 that demonstrates disconnecting from QBO.
- Pushed on 11/04/2013 by Christian
- QuickBooks Integration Consulting
