Integrating Rails and QuickBooks Online via the version 3 API: Part 2
Tutorial and screencast use
Rails 4, Ruby 1.9.3, and Pow. Be sure to watch the screencast above as I unveil more details and tidbits than can be found in the article itself.
- Continuing with Part 1, add an
email_addressattribute to the Vendor. - Update the views to reflect adding
email_address. app/views/vendors/_form.html.erbapp/views/vendors/index.html.erbapp/views/vendors/show.html.erb- Reload browser to test that the views have been updated.
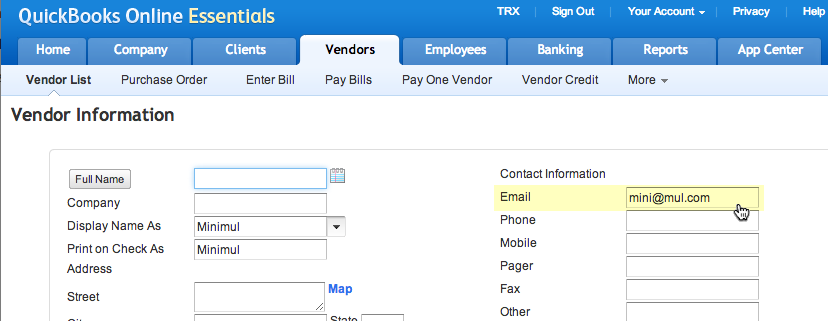
- Create a new vendor on Rails and QuickBooks Online.
- Create a
before_actionfilter withinapp/controllers/vendors_controller.rbto activate the vendor service. - Whitelist the
email_addressattribute within thevendors_controller. - Alter the
createaction within thevendors_controller. - Reload browser and then click
New vendorlink.
Fill in form and click 'Create Vendor'. - Go over to your QuickBooks Online account and check if the vendor was composed.
$ rails g migration add_email_address_to_vendors email_address
$ bundle exec rake db:migrate
... omitted
<div class="field">
    <%= f.label :email_address %><br>
    <%= f.email_field :email_address %>
</div>
... omitted
   ... omitted
    <tr>
      <th>Name</th>
      <th>Email address</th>
      <th></th>
      <th></th>
    </tr>
  </thead>

  <tbody>
    <% @vendors.each do |vendor| %>
      <tr>
      ... omitted
        <td><%= vendor.email_address %></td>
        <td><%= link_to 'Show', vendor %></td>
        <td><%= link_to 'Edit', edit_vendor_path(vendor) %></td>
        <td><%= link_to 'Destroy', vendor, method: :delete, data: { confirm: 'Are you sure?' } %></td>
      </tr>
    <% end %>
  ... omitted
... omitted
<p>
  <strong>Email address:</strong>
  <%= @vendor.email_address %>
</p>
... omitted
class VendorsController < ApplicationController
  before_action :set_vendor, only: [:show, :edit, :update, :destroy]
  before_action :set_qb_service, only: [:create, :edit, :update, :destroy]
#... omitted
    private
#... omitted
    def set_qb_service
      oauth_client = OAuth::AccessToken.new($qb_oauth_consumer, session[:token], session[:secret])
      @vendor_service = Quickbooks::Service::Vendor.new
      @vendor_service.access_token = oauth_client
      @vendor_service.company_id = session[:realm_id]
    end
end
    def vendor_params
      params.require(:vendor).permit(:name, :email_address)
    end
  # .. omitted

  def create
    @vendor = Vendor.new(vendor_params)
    vendor = Quickbooks::Model::Vendor.new
    vendor.given_name = vendor_params[:name]
    vendor.email_address = vendor_params[:email_address]
    @vendor_service.create(vendor)
    respond_to do |format|
    # .. omitted
  end
For a “real app” you should have the
quickbooks-ruby code always handy to guide you in mapping your vendors (or customers, employees, etc.). In this example, use the quickbooks-ruby vendor model code as a reference.
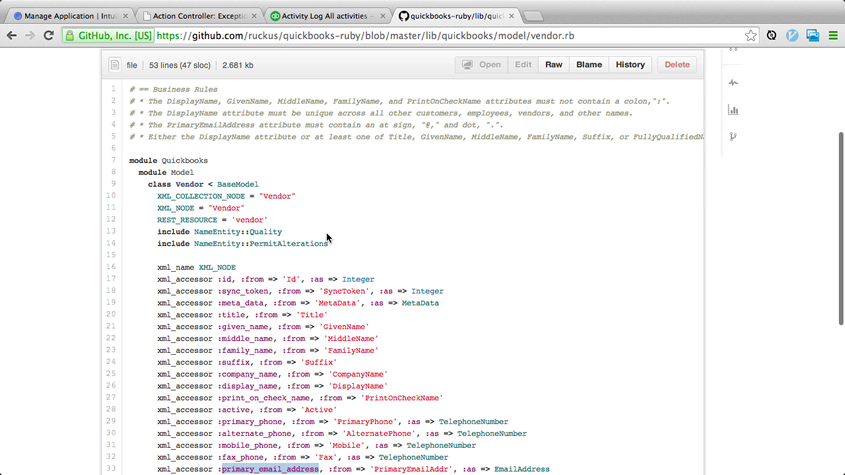

include keywords. For example, the vendor model draws methods from the NameEntity module.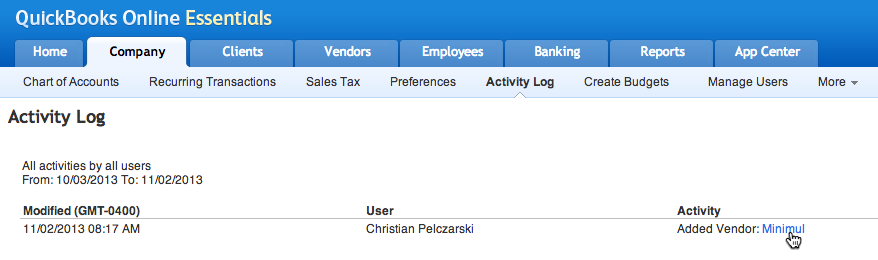
Next, updating a vendor in Rails and QuickBooks Online
In Part 3 I demonstrate updating an entity at QBO. I also exhibit basic debugging using the logging feature of quickbooks-ruby.
- Pushed on 02/05/2014 by Christian
- QuickBooks Integration Consulting