Integrating Rails and QuickBooks Online via the version 3 API: Part 1
Minimul says —
IMPORTANT: Intuit has introduced and requires developing against sandboxes for U.S. QBO.
See my new article, Connect Rails and QuickBooks Online via Sandbox, which would come in around step 4 or so for this article.
Tutorial and screencast use
Rails 4, Ruby 1.9.3, and Pow. Be sure to watch the screencast above as I unveil more details and tidbits than can be found in the article itself.
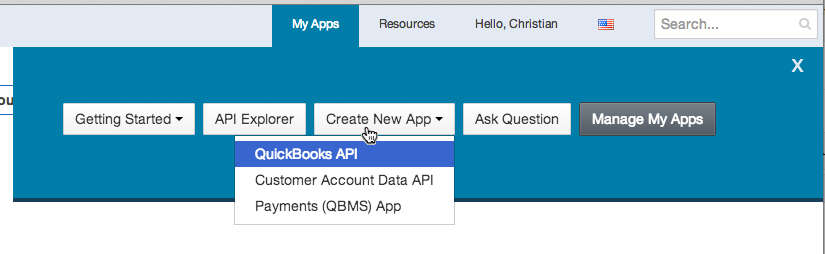
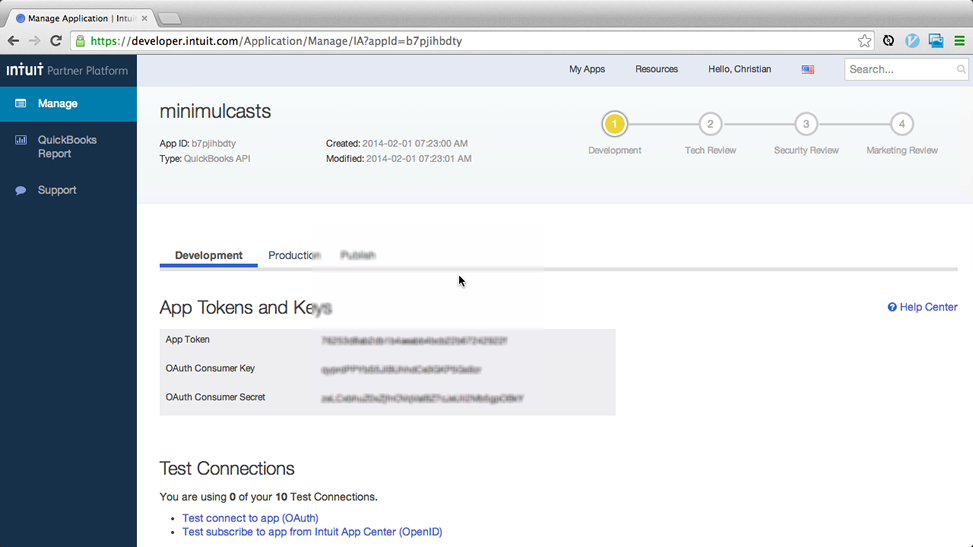
- If you haven't already, sign up at Intuit Partner Platform
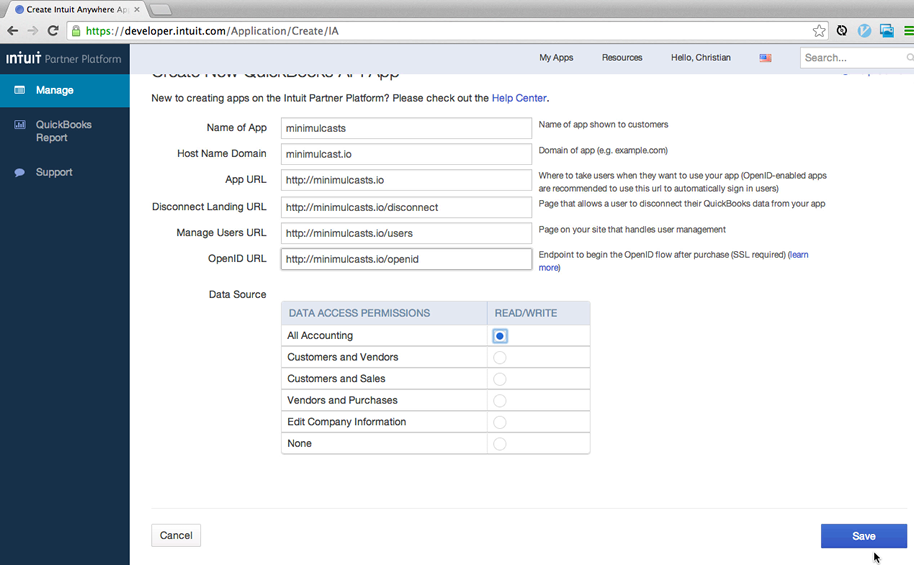
- Create a new app.
- Create a new Rails app and hook it up with Pow.
- Add the quickbooks-ruby and oauth-plugin gems.
- Beget Vendor scaffolding
- Create
config/initializers/quickeebooks.rb. - Modify
config/routes.rb. - Make sure application level changes take by reloading with a
touch tmp/restart.txt - Next, hook actions up to those new routes
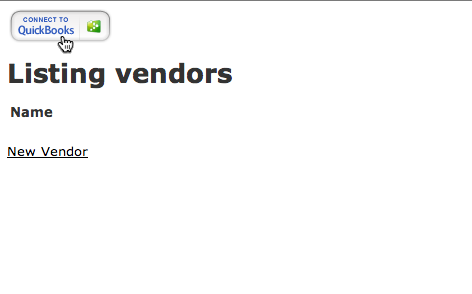
app/controllers/vendors_controller.rb. - Add Intuit Connect button to application layout at
app/view/layouts/application.html.erb. - In your browser go to:
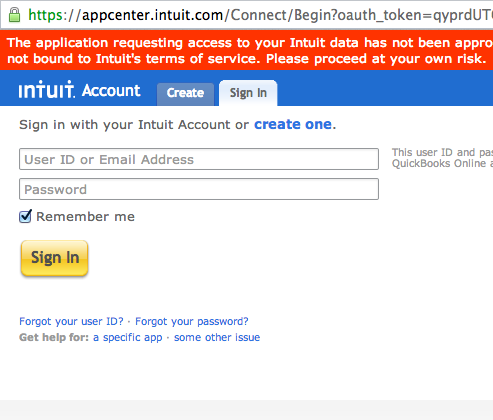
http://minimulcasts.dev - Click on the 'Connect with QuickBooks' button
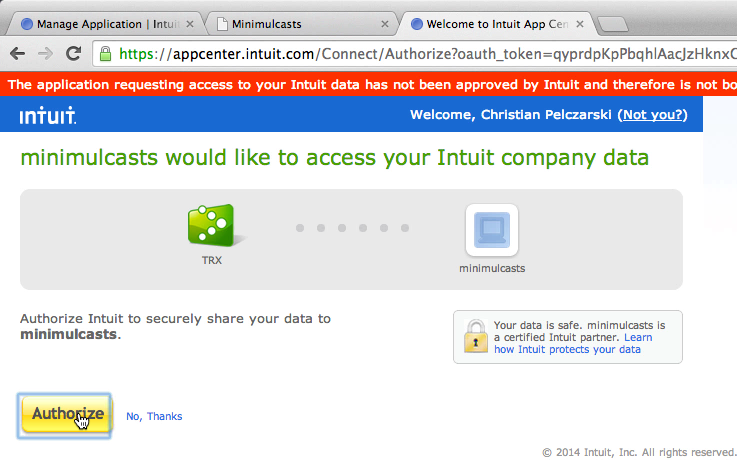
- Once authenticated Intuit will return a GET request to the
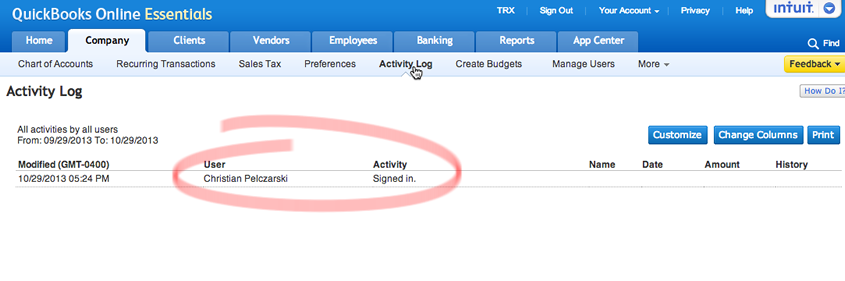
/vendors/oauth_callback. - Finally, double check that the QBO connection was successful by logging into QuickBooks Online then go to the 'Company' tab and then to the 'Activity Log' submenu.
If you already have a QBO account you can use your username and password to join as a developer. If you are a developer desiring a test account then email Intuit @
ippdevelopersupport@intuit.com and request a developer subscription to QBO.
$ cd ~/www/labs # example
$ rails new minimulcasts
$ ln -s ~/www/labs/minimulcasts ~/.pow
$ curl -L minimulcasts.dev | grep "Welcome" # Test POW
$ cd minimulcasts
# Gemfile -> add these two gems:
gem 'quickbooks-ruby'
gem 'oauth-plugin'
$ bundle install
$ rails g scaffold Vendor name
$ bundle exec rake db:migrate
QB_KEY = "<copy from developer.intuit.com>"
QB_SECRET = "<copy from developer.intuit.com>"

$qb_oauth_consumer = OAuth::Consumer.new(QB_KEY, QB_SECRET, {
    :site                 => "https://oauth.intuit.com",
    :request_token_path   => "/oauth/v1/get_request_token",
    :authorize_url        => "https://appcenter.intuit.com/Connect/Begin",
    :access_token_path    => "/oauth/v1/get_access_token"
})
Minimulcasts::Application.routes.draw do
  resources :vendors do
    collection do
      get :authenticate
      get :oauth_callback
    end
  end

  root to: 'vendors#index'
end
Minimul says —
Pay attention to the Rails 4.1 and greater notes in the next 2 methods.
# app/controllers/vendors_controller.rb
# .. code omitted
def authenticate
callback = oauth_callback_vendors_url
token = $qb_oauth_consumer.get_request_token(:oauth_callback => callback)
session[:qb_request_token] = token
# If Rails >= 4.1 you need to do this => session[:qb_request_token] = Marshal.dump(token)
redirect_to("https://appcenter.intuit.com/Connect/Begin?oauth_token=#{token.token}") and return
end
def oauth_callback
at = session[:qb_request_token].get_access_token(:oauth_verifier => params[:oauth_verifier])
# If Rails >= 4.1 you need to do this => at = Marshal.load(session[:qb_request_token]).get_access_token(:oauth_verifier => params[:oauth_verifier])
session[:token] = at.token
session[:secret] = at.secret
session[:realm_id] = params['realmId']
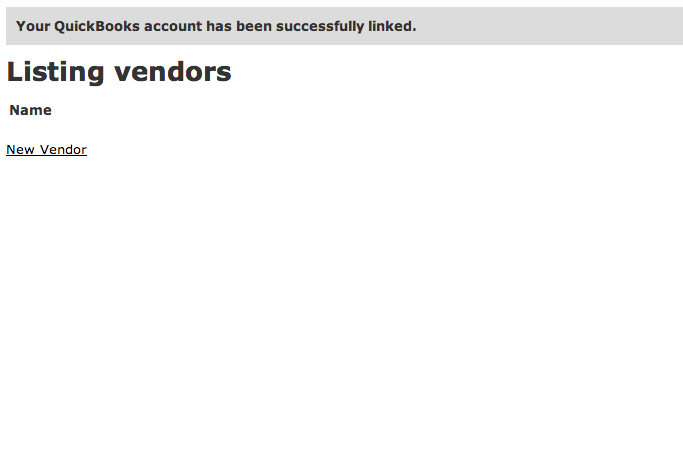
redirect_to root_url, notice: "Your QuickBooks account has been successfully linked."
end
private
# .. code omitted
You will persist the token, secret & realmId to the database. Those 3 items are needed to communicate with QBO. For brevity, sessions are used for persistence.
  .. omitted
  <body>
    <!-- REPLACE THE BODY of the default application.html.erb with this -->

    <% unless session[:token] %>
      <ipp:connectToIntuit></ipp:connectToIntuit>
    <% end %>

    <% if notice %>
      <div style="padding: 10px;background: gainsboro;font-weight: 900;width: 50%;"><%= notice %></div>
    <% end %>

    <%= yield %>

    <script type="text/javascript" src="https://appcenter.intuit.com/Content/IA/intuit.ipp.anywhere.js"></script>

    <script>
        intuit.ipp.anywhere.setup({menuProxy: '/path/to/blue-dot', grantUrl: '<%= authenticate_vendors_url %>'});
    </script>
  </body>
Next, creating a vendor in Rails and QuickBooks Online
In Part 2 I demonstrate actually creating an entity over at QBO.
- Pushed on 02/03/2014 by Christian
- QuickBooks Integration Consulting