Increased Developer Productivity with Tmux, Part 4: Starter templates
Creating a Tmux Starter Template
In Part 3 I covered Tmux session management. In this installment, I instruct on how to created your own Tmux starter templates. As you start relying on Tmux as a development tool you are going to find yourself going through many of the same motions when applying it to a project. For example, you always use the first window for Vim with a right pane for running specs, so you run the commands for splitting the first window into 2 vertical panes, labeled "Vim", and you resize the left pane to be wider because you want to prevent word wrapping. Next, Git always used for window 2 so you go through a series of similar commands. Next, the same tedious process is repeated for window 3 and so on and so on. Let's explore how to automate this with a starter Tmux template.
The starter template I discuss in this article and screencast can be found here. In addition, I use one other template for Rails projects.
- I am going to go over my general purpose starter template,
~/.tmuxgo. - The first part of the script automatically names the Tmux session based off of the current directory.
- Next the Tmux session is created but in a detached state.
- I always have my first Tmux window designated for Vim usage with a right pane for tests or other miscellaneous commands.
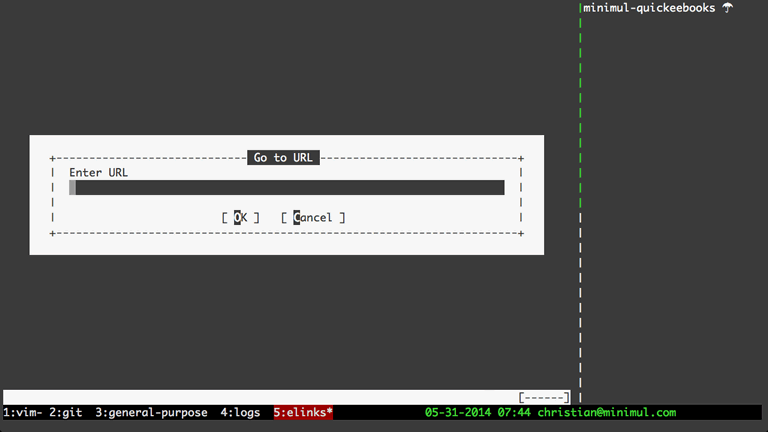
- Let's open up Tmux with the starter script to display how the first window looks.
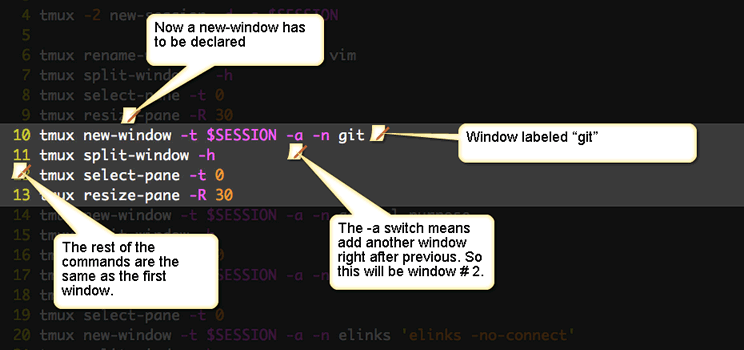
- My second window is for Git usage.
- Moving around windows is done with a
<prefix>-<window-number>e.g.<prefix>-<3>to move to the 3rd window.<prefix>-<n>moves to the next window and<prefix>-<p>moves to the previous window. - Windows 3 & 4 are similar to the other 2 windows but the 5th window introduces running a shell command.
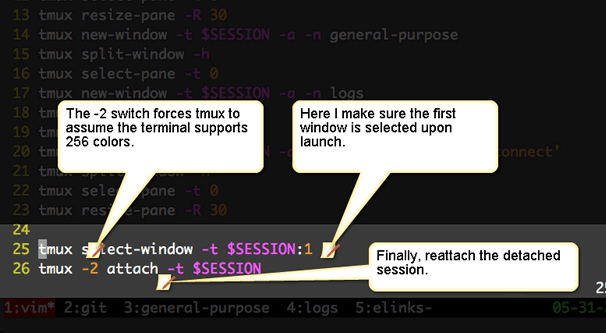
- The last two commands: (1) make sure that the first window is selected upon launch; and (2) reattaches the detached session.
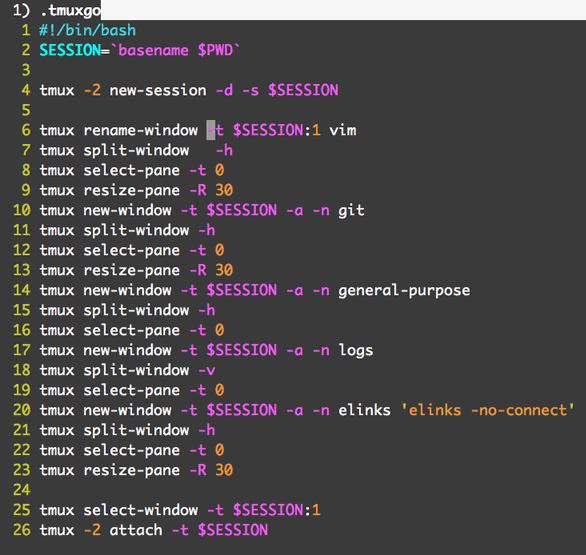

/Users/christian/github/minimul-quickeebooks the name of the session will be minimul-quickeebooks.
-d switch is for detach. Why? Because the rest of commands to follow will not work unless the session is a detached state.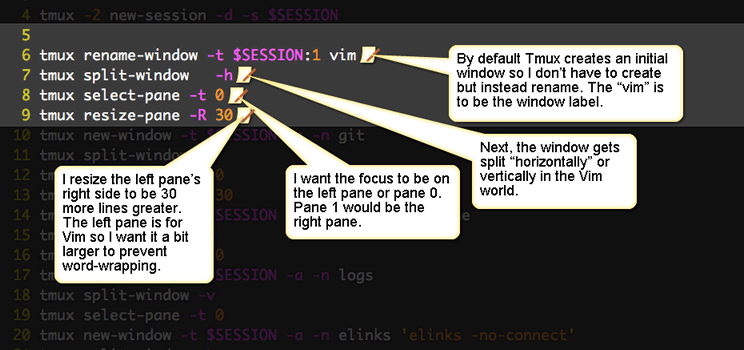

chmod +x ~/.tmuxgo perms set.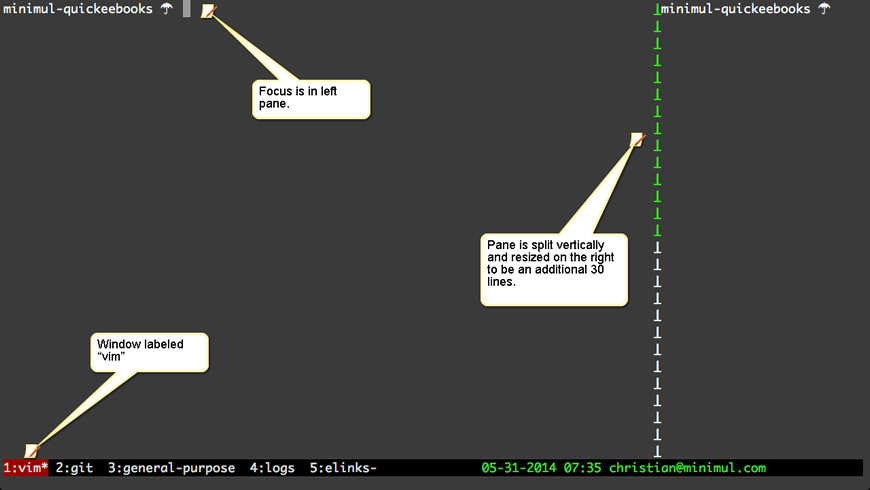

That concludes installment 4. Tmux Starter Templates
Once you start investing in Tmux as a development tool you will quickly tire of having to setup your basic windows, panes, pane sizing, and executing routine commands for every project. In the article and screencast I instruct on how to automate this pain point with an uncomplicated bash script.
I'd also make you aware of Tmuxinator, which also seeks to address this challenge. I have not used the tool as the approach taught in this article has satisfied my needs, therefore, you also may want to start with this method. Next in part 5, I address the powerful send-keys command. While you are waiting for the article check out the screencast that is already baked.
If you like this article and screencast go to the dedicated page for this series at http://minimul.com/teaches/tmux.
- Pushed on 06/16/2014 by Christian
