Getting started with Nodejs and QuickBooks Online Part 2
Continuing from Part 1
In part 1 we just did the bare minimum. Now, in part 2 we are going to go a bit further by creating a customer route where we will pass in an id and then retrieve the associated customer from the developer sandbox and output their "DisplayName" value.
- Let's start by making that new route right below the
/startroute inapp.js. - Then make a new customer view in
views/customer.ejs - Go to the browser and run the route
http://localhost:3000/customer/5. - You should see "5" output to the console running
nodemon app.js. - Next, we are going implement basic persistence with the
cookie-sessionNPM package - Back in
app.jsmake the following modifications. - Let's save the OAuth token, secret, and realmId. Go to line 78 or
app.jsand insert this code to persist these values across requests. - We must make a way to call the Quickbooks initialization code a little easier and DRYer.
- Go to the end of
app.jsand make a global function to easily initialize the Quickbooks object from node-quickbooks. - Replace this similar code from the
/callbackmethod after the session save code in step 7. - Now modify the
/customer/:idroute to look like this: - Then modify the
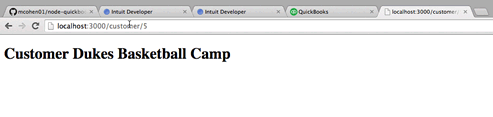
views/customer.ejsto output theDisplayName. - Go back to the browser at
http://localhost:3000/startand click on the "Connect to QuickBooks" button and run through OAuth again. The will save your OAuth token, secret, and realmId in sessions. - After that run the
http://localhost:3000/customer/5route. - You should get:
app.get('/customer/:id', function (req, res) {
  console.log(req.params.id);
  res.render('customer.ejs', { locals: { customer: customer }})
}
<!DOCTYPE html>
<html lang="en">
<head>
  <meta charset="UTF-8">
  <title></title>
</head>
<body>
  <h1>Customer</h1>
</body>
</html>
We need to persist the OAuth token, secret, and Intuit's realmId (now referred as the "company id") to make repeated API calls. In a real app you would use a data store like Postgres, Redis, etc. Here we will use sessions, however, the express-session only persists for a short duration and is meant for data stores. Therefore, let's use the cookie-session package to get some basic persistence.
$ cd example/
$ npm install cookie-session --save // --save option saves the entry to example/package.json
....
cookieParser = require('cookie-parser'),
-    session    = require('express-session'),
+    cookieSession    = require('cookie-session'),
....
-app.use(session({resave: false, saveUninitialized: false, secret: 'smith'}));
+app.use(cookieSession({name: 'session', keys: ['key1']}))
....
    // Line 78
    req.session.qbo = {
      token: accessToken.oauth_token,
      secret: accessToken.oauth_token_secret,
      companyid: postBody.oauth.realmId
    };
var getQbo = function (args) {
  return new QuickBooks(consumerKey,
                       consumerSecret,
                       args.token,
                       args.secret,
                       args.companyid,
                       true, // use the Sandbox
                       true); // turn debugging on

};
qbo = getQbo(req.session.qbo);
app.get('/customer/:id', function (req, res) {
  console.log(req.session);
  var qbo = getQbo(req.session.qbo);
  qbo.getCustomer(req.params.id, function(err, customer) {
    console.log(customer);
    res.render('customer.ejs', { locals: { customer: customer }})
  })
})
<h1>Customer <%= customer.DisplayName %></h1>
Conclusion
That's a wrap for part 2, in which I created a customer route that looked up and outputted a QuickBooks Online customer "DisplayName". Also, reference the code for this 2-part tutorial.
- Pushed on 09/08/2015 by Christian
- QuickBooks Integration Consulting