Using S3 and Cloudfront to serve up images
Tutorial is done on OSX – adjust for your ecosystem. An Amazon Web Services (AWS) and DNS account is assumed.
- From the AWS console, create a new or use an existing S3 bucket. I'll use an existing bucket named 'minimul-images'
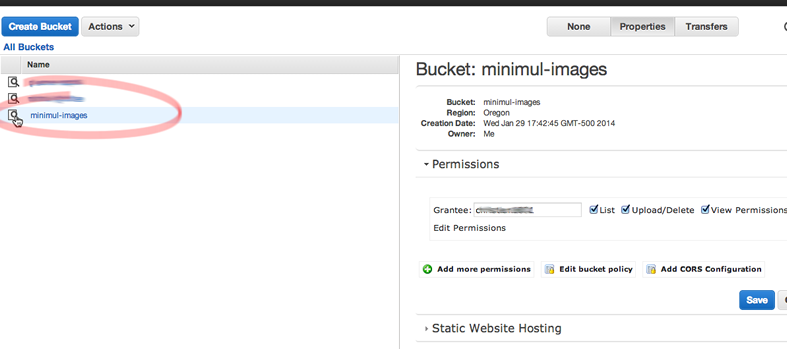
- Click the magnifying glass icon to the bucket's left to display the bucket properties.
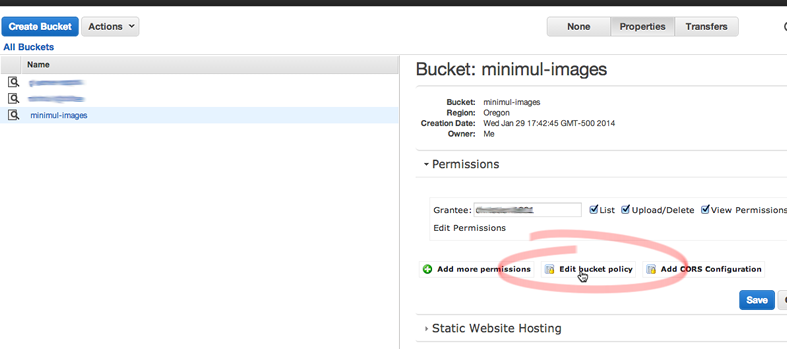
- Click on 'Edit bucket policy'
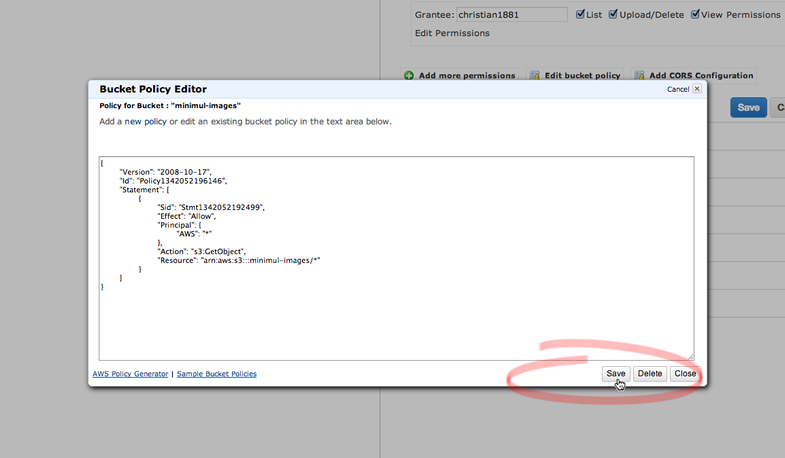
- Replacing your bucket name, cut and paste the following JSON inside of the popup policy editor. This gives the proper public access permissions to all sub-folders of the bucket.
- Set up
s3cmd - Upload some files
- From the AWS console, create a new Cloudfront distribution.
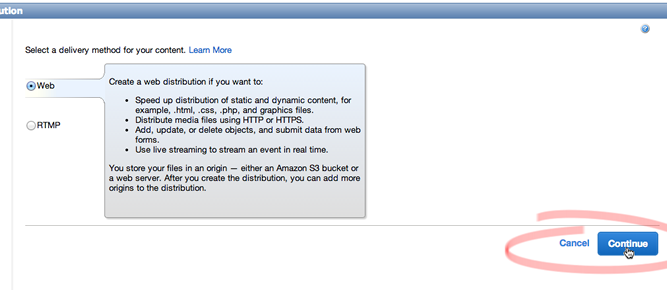
- Click 'Continue' on the next screen to create a web distribution.
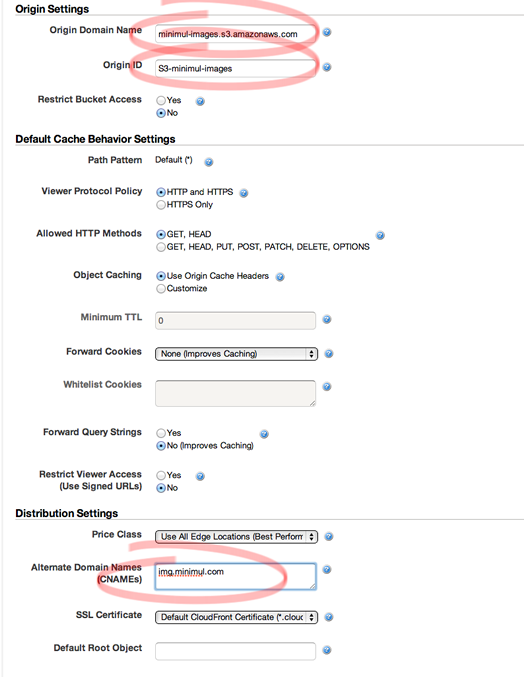
- Choose
YOUR-BUCKET-NAME.s3.amazonaws.comfrom the dropdown for 'Origin Domain Name'. Also, add a CNAME likeimg.YOUR-DOMAIN-NAME.com - Click 'Create Distribution' and wait until the status goes from 'inProgress' to 'Deployed'.
- Set up the CNAME at your DNS provider.
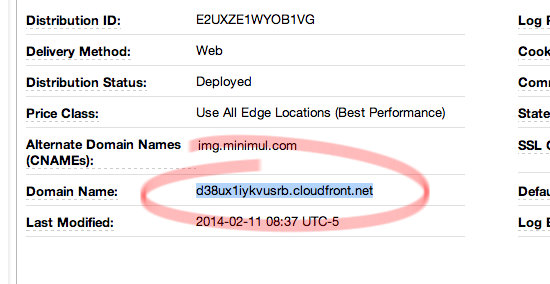
- Get the Cloudfront domain name.
- Add CNAME entry
- After the CNAME record has propagated try to access the image e.g.
https://d38ux1iykvusrb.cloudfront.net/articles/112/s3-cloudfront-distro-deployed.png - Congrats, you are serving up images via Amazon's Cloudfront CDN.
{
"Version": "2008-10-17",
"Id": "Policy1342052196146",
"Statement": [
  {
    "Sid": "Stmt1342052192499",
    "Effect": "Allow",
    "Principal": {
      "AWS": "*"
    },
    "Action": "s3:GetObject",
    "Resource": "arn:aws:s3:::YOUR-BUCKET-NAME/*"
  }
]
}
$ brew install --devel s3cmd # installs multipart-upload-capable version of s3cmd.
$ s3cmd --version
s3cmd version 1.5.0-beta1
$ s3cmd --configure
# Go thru the wizard and select defaults for everything
# but enter in your AWS access and secret
s3cmd ls s3://YOUR-BUCKET-NAME # Test
# Example
s3cmd sync /public/images/articles/112 s3://minimul-images/articles/
This is will create a directory structure on s3 as such:
s3://minimul-images/articles/112. Because there is no trailing slash after the 112, this directory will be created. The articles directory will also be created if it does not exist.




- Pushed on 02/12/2014 by Christian
